Home

 Hardware

 Audio
 Controllers
 General
 Mainboards
 Memory
 Modems
 Monitors
 Portables
 Printers
 Processors
 Scanners
 Storage
 Video

 Games

 Reviews
 Previews
 Cheats & Hints

 News

 Current News
 Archives

 General Info

 About Us
 Advertising
 Awards
 Contact Us
 Hot Links
 

 Downloads
 

 Message Board
 
 
Enter your e-mail address below.
Click here to join our announcement list!

We'll notify you when we publish new articles.


Installation

Installation is a breeze! But there is a proviso- make sure that USB is enabled in your BIOS.

Follow the manual to the dot. That's the reason it is there! The UNIX community has an acronym for it… RTFM. I am not going to explain any further (your welcome to take a guess) but I can assure you it's quite rude and to the point! If you haven't used USB devices, you will be surprised to learn that you do not have to turn the computer off to install the WebCam III.

Just plug it into one of the USB slots at the rear, or the front for most brand name machines. Next comes the software.

 
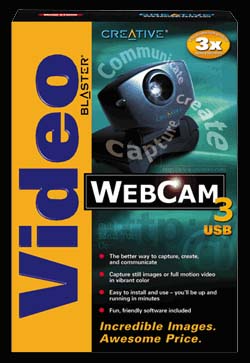
The box

It would have been nice to do the customization all up front and then just install everything I wanted but it kept asking me for guidance along the way. Maybe Creative would take notice of this and improve their installer. Once installed, you can unplug and plug in the WebCam III whenever you wish.

Now that everything is set up, it's just a matter of placing the WebCam III in a convenient location, the top of the monitor being a pretty good one -which not only gives a clear view of you to the world but also looks real cool to show off to your friends.

Creative have not included a videophone application of their own with the WebCam III. But the installation CD does include a copy of Internet Explorer 5 with NetMeeting.


Table of contents  
Introduction The Software
Specifications Usage Report
Installation Conclusion


Copyright © 1998-1999 - REVIEW ZONE - All rights reserved. Privacy policy.